The engineering design process is an important part of science and STEM education. It helps students think like scientists and develop critical thinking and problem-solving skills. One way to teach it is by having the students design a bridge that can withstand the tremors of an earthquake, structured around the 5E model lesson plan to maximize learning and engagement.
5E Model lesson Plan Phase 1: Engage
I like to begin the lesson with a captivating discussion on the infamous collapse of the Tacoma Narrows Bridge. This historical event is a perfect example to spark curiosity and set the stage for exploring engineering failures.
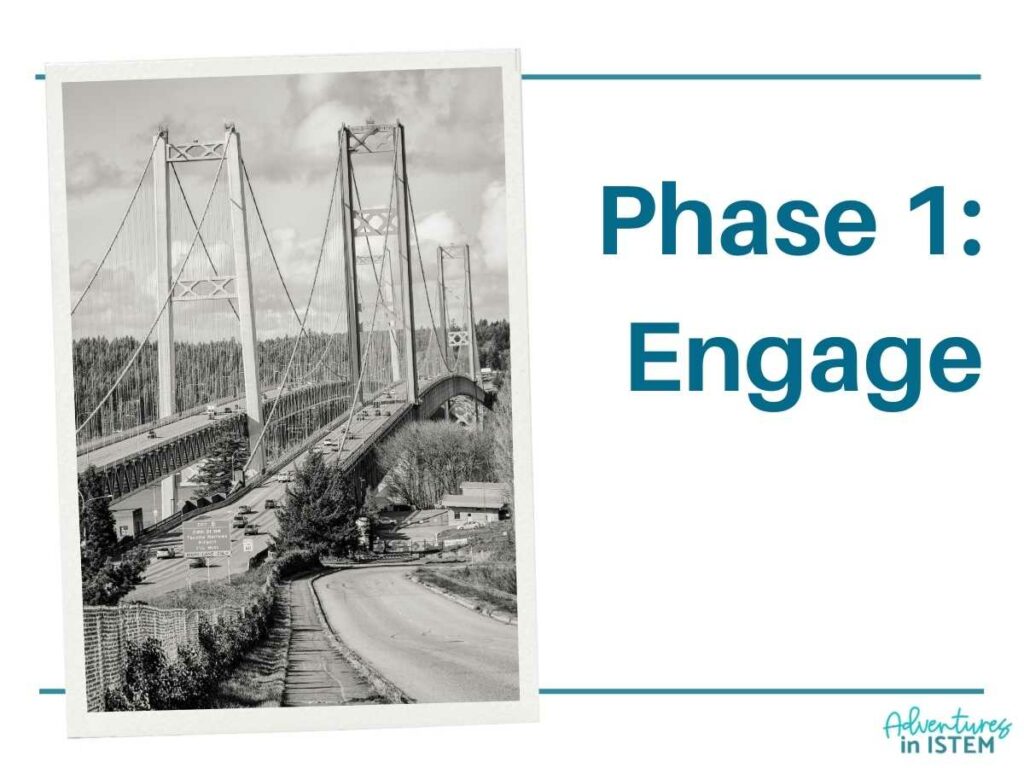
My students are always amazed at how news was brought to people back then with the dramatic narration of the event. I encourage my students to think about what factors contribute to such structural failures and how engineers overcome these challenges.
5E Model lesson Plan Phase 2: Explore
During the “Explore Phase” students are challenged to develop their own ideas of what the engineering design process is and how it can be used to solve problems. This phase can take 1 to 3 days depending on how you want to do it.
The phase consists of three science stations designed to deepen students’ understanding through hands-on activities supported by digital resources to enhance their learning experience. You can have the students visit all three stations or choose which station they want to see and learn from.
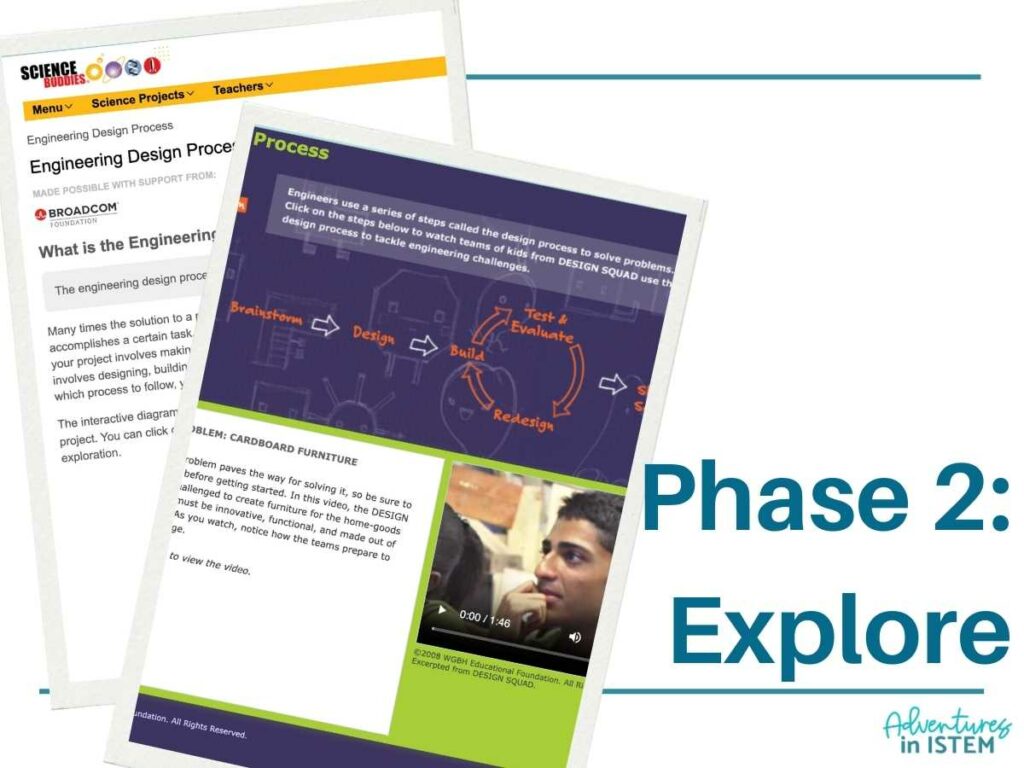
Station A: Website Research. In this station, students will begin their journey into the engineering design process by conducting website research. They are directed to visit a specific website to read about the steps involved in the process. As they navigate through the content, they should take detailed notes summarizing each step, which will serve as valuable references for understanding the complexities of engineering designs.
Station B: Instructional Video. In the second station, students will engage with a video explaining the engineering design process. This visual and auditory learning experience allows them to see the process in action, ideally complementing the textual information they gathered in Station A. After watching the video, students are expected to take comprehensive notes on each part of the process discussed, reinforcing their learning through multiple forms of media.
Station C: Combined Online Investigations and Video. The final station offers a blend of online investigation and video learning. Students will visit another designated website to read additional information about the engineering design process steps and watch a corresponding video. This station emphasizes the integration of reading and visual learning as students document each step with detailed notes. This method helps cement their understanding by comparing and contrasting the information from various sources.
I have my students record their observations and notes in a unit packet that they use during the full 5E lesson to record their information and can reference during the lesson. By the end of the exploration phase, students should have a basic understanding of the engineering design process and how it can be used to solve problems.
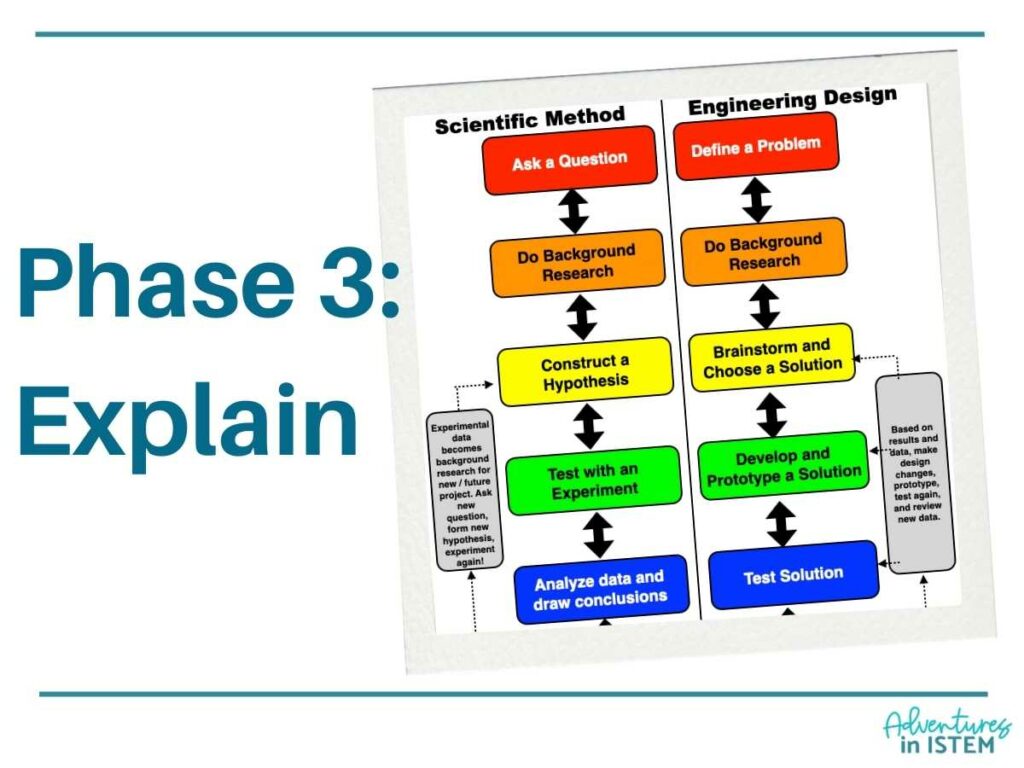
5E Model lesson Plan Phase 3: Explain
The “Explain” phase of the 5E lesson plan is centered on teaching students about the engineering design process and the importance of each step. It can be taught in different ways, allowing teachers to tailor the experience best to fit their classroom and students’ needs. It can be done within a day or two using different modalities like guided readings, instructional videos, and digital notebook activities, offering a choice of instructional methods.
Options for Explaining the Engineering Design Process:
Teachers can opt for a structured, guided reading session where students delve into detailed descriptions of each step in the engineering design process. This option is particularly effective for students who benefit from a text-based approach to learning, allowing them to absorb information at their own pace and refer back to complex details as needed.
Another powerful tool is using instructional videos that visually and audibly walk students through the engineering design process. This method is ideal for visual and auditory learners who grasp concepts better through dynamic presentations and real-world examples. Videos can make abstract concepts more accessible by providing visual representations and demonstrations. If you choose this method, I recommend using a program like Edpuzzle that allows you to embed questions into the video to check for understanding.
Teachers can direct students to complete entries in a digital notebook during direct instruction for a more interactive approach. This activity involves summarizing and reflecting on each step of the engineering design process. It’s a great way for students to process the information they’ve learned actively and for teachers to assess understanding and clarify misconceptions in real-time.
Teachers can decide whether to integrate all three methods into their teaching plan or select the one that best aligns with their student’s learning preferences. For instance, a class might start with a video to introduce the topic compellingly, followed by a guided reading to reinforce and deepen understanding and culminate with the digital notebook activity to synthesize and evaluate the students’ grasp of the material.
This choice-driven approach enhances engagement by allowing students to interact with the material in the most resonant form. It empowers teachers to adapt their instructional strategies to achieve the best educational outcomes. Whether reading, watching, or interacting, each method provides a unique avenue for exploring the engineering design process, ensuring that students learn the material and apply their knowledge effectively.
5E Model lesson Plan Phase 4: Extend/Elaborate
The “Extend/Elaborate” phase of the 5E lesson plan is an important step where students apply their acquired knowledge to tackle a real-world challenge, integrating the concepts they’ve learned into a practical application. Over two days, this phase tasks students to design and construct a model raft, simulating a scenario where they must cross a newly formed river. This activity consolidates their understanding of the engineering design process and fosters critical thinking and creativity. It also allows the teacher to clarify misconceptions about the engineering design process and help guide students through each part.
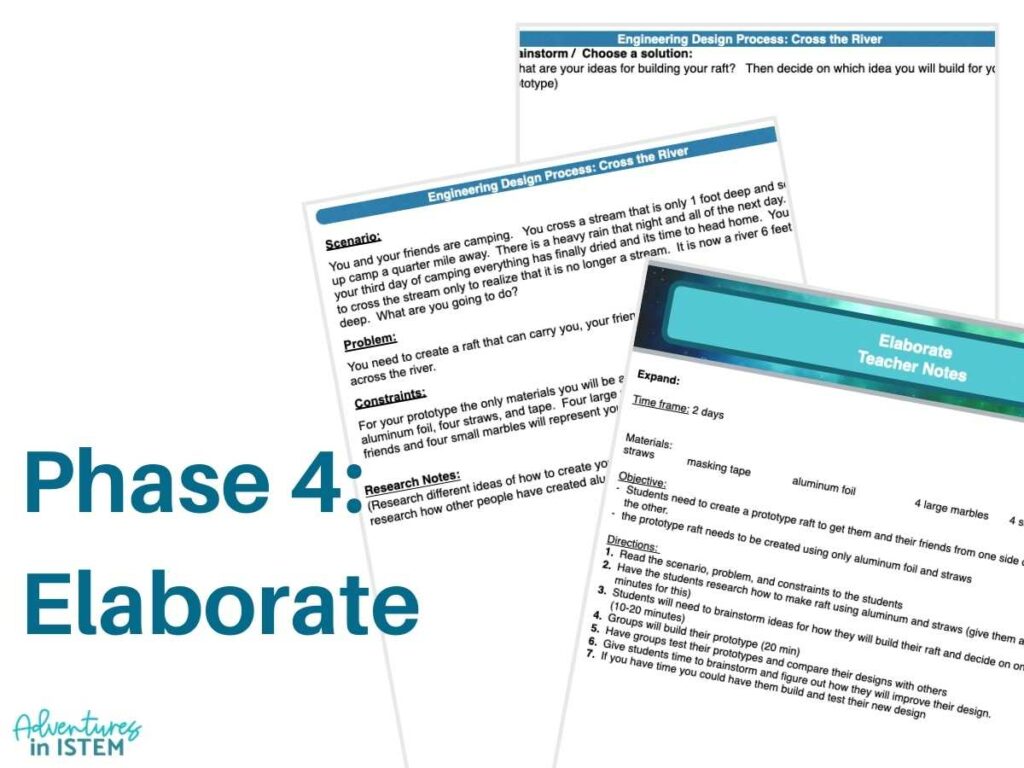
Students are presented with a scenario: After a camping trip, a once shallow stream has turned into a six-foot-deep river due to heavy rainfall. Their challenge is to create a raft capable of safely transporting them and their gear across this river. The primary materials for the raft construction are aluminum foil, straws, and tape, with marbles representing the campers and their gear.
Begin by reading the scenario aloud, clearly outlining the problem and constraints. Then, allocate about 10-20 minutes for students to research different methods for constructing rafts using aluminum foil and straws. Given the materials and constraints, this research phase encourages students to gather various ideas and evaluate their potential effectiveness.
After researching, students spend another 10-20 minutes brainstorming possible designs. This stage is crucial for encouraging creative thinking and collaboration as students discuss their findings and decide on the most viable raft design to pursue.
Groups are then given 20 minutes to build their prototype rafts. This hands-on construction allows students to put their theoretical knowledge into practice, adapting their designs based on the physical properties of the materials.
Once the prototypes are built, each group tests their raft by attempting to transport the marbles across a designated “river” in the classroom. This test demonstrates whether the rafts meet the challenge’s requirements and provides immediate feedback on the design’s effectiveness.
Based on the outcomes of the initial tests, students reflect on their rafts’ performance and brainstorm ways to refine their designs. If time allows, groups can build and test a revised version of their raft, applying lessons learned from the first iteration.
The teacher facilitates the learning process during this phase without directly providing solutions. Teachers should encourage students to explore different possibilities, support their decision-making process, and guide safely testing their designs. Teachers also need to foster a reflective environment where students feel comfortable discussing what worked, what didn’t, and why—turning each outcome into a learning opportunity.
5E model lesson Plan Phase 5: Evaluation
The evaluation stage of the 5E lesson is more than just a multiple choice test. Students need to demonstrate their knowledge. I suggest giving them a short multiple choice/ short answer test and then having them do a performance assessment where they will demonstrate their understanding of building a bridge. Over three days, this phase engages students to design and construct a model bridge, simulating a scenario where they must span a gap caused by a geological disturbance. This project consolidates their understanding of engineering principles and enhances their critical thinking and creativity.
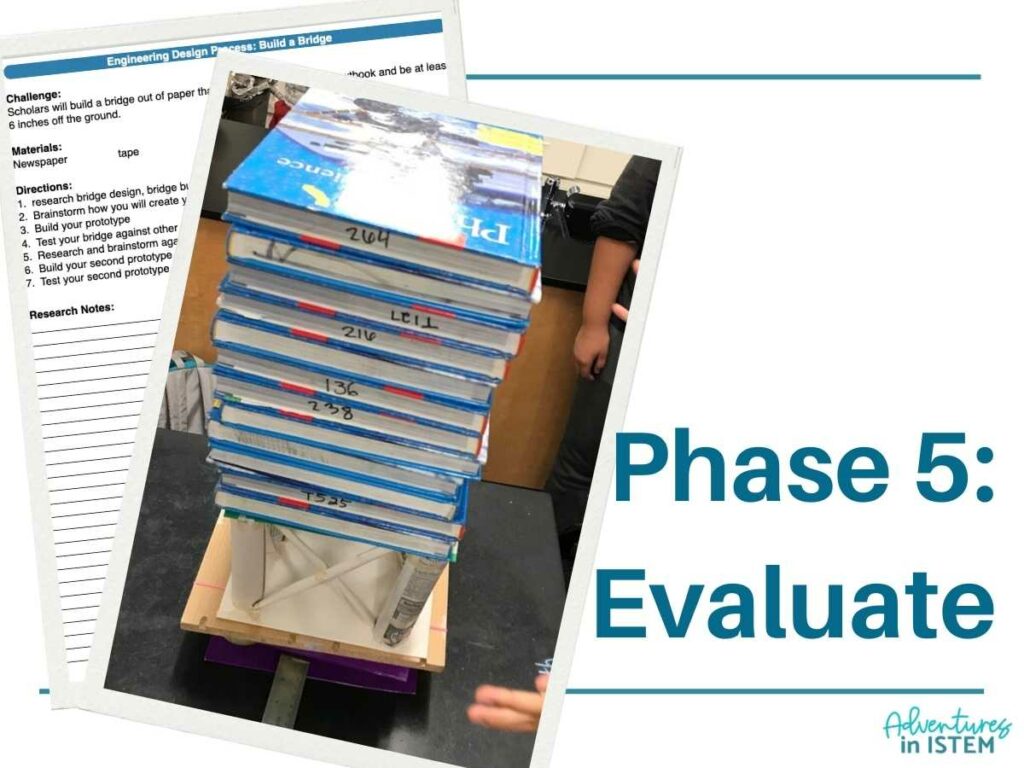
Students face a challenge: They need to build a bridge spanning a six-foot gap created by recent seismic activity. The bridge must be sturdy enough to safely transport essential supplies across the gap. The primary materials for the bridge construction are newspapers, tape, and card stock, which will serve as the roadway.
Start by presenting the scenario, outlining the problem and constraints clearly. Allow 10-20 minutes for students to research different bridge designs that could be constructed using the provided materials. This research phase encourages students to explore various structural designs and assess their feasibility.
After researching, students spend another 10-20 minutes brainstorming potential designs. This stage fosters creative thinking and collaboration as students share their ideas and decide on the most viable bridge design to pursue.
Groups are then given sufficient time to build their prototype bridges. This hands-on construction phase allows students to apply their theoretical knowledge and adapt their designs based on the properties of the materials.
Once the prototypes are built, each group tests their bridge by attempting to transport tennis balls across it. This test checks if the bridges meet the challenge’s requirements and provides immediate feedback on the design’s effectiveness.
Based on the outcomes of the initial tests, students are encouraged to reflect on their bridge’s performance and brainstorm ways to refine their designs. If time allows, groups can build and test a revised version of their bridge, applying the lessons learned from the first iteration.
For an additional challenge, place the bridge on a moving platform to simulate an earthquake, testing its stability and robustness in dynamic conditions.
This phase of the lesson plan reinforces students’ understanding of the engineering design process and highlights the importance of iteration and resilience in problem-solving. Engaging students in real-world problems enhances their ability to apply theoretical knowledge in practical, creative ways, preparing them for more complex challenges in future projects.
Using the 5E lesson plan to teach the engineering design process helps students learn the steps of the design process through different modalities. Students have a chance to learn through inquiry at the beginning of the 5E lesson and then are taught the steps; they then can reinforce their understanding by going through the entire engineering design process to build a raft during the elaborate phase before demonstrating their knowledge with building a bridge during the evaluate phase.