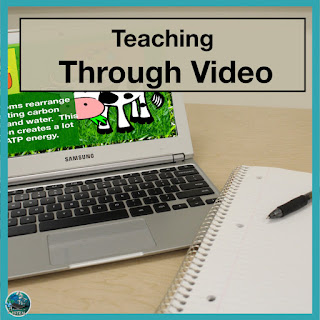
Does this sound familiar. It’s the point in the lesson when it’s time to give the students the basic information about the topic. You create this great presentation. It has all the information the students need to know including checks for understanding. You set aside 15 minutes during the lesson for these notes and have an application activity to follow that will take around 35 minutes. The day comes to show the presentation to the students and it doesn’t go as you planned.
Some students quickly copy the information into their notes, other students are still setting up their notes and your already onto the next slide, and some students start off taking the notes and then their brains check out for a bit as they start thinking about something that happened at home. When they check back in they realize they missed two slides of information and are trying to catch up. Plus as they are supposed to be writing down what is on the slide while you are verbally adding information about it going into more explanation and giving examples. Some students are busy listening to you and they forget to write down what is on the slides, while others are so busy trying to copy down what is on the slides that they don’t listen to a word of what you are saying. All of this becomes apparent when you get to your embedded checks for understanding slides and realize that some students missed the key parts. The notes take you 35 minutes to get through instead of your projected 15 and now you only have about 10 minutes for practice. Leaving the class not prepared for that nights homework.
If you have students that are language learners or have a learning disability, trying to listen to a teacher, look at the information on the slide, and write everything down can be very challenging. The result is that they miss information and it takes two to three times as long to give students the information. And if you have students that can process things quickly they are left sitting board while waiting for the class to catch up. This can lead to behavioral disruptions in class as they try and entertain themselves while waiting making the note taking part of the lesson take even longer as you are dealing with these students.
There has to be a better solution. One that allows students to move at their own pace. For me, the solution came through videos. With videos, the students can take notes at their own pace. They can pause the video so that they are not writing and listening at the same time. They can rewatch a segment that they don’t understand or watch it again before a test. There are video hosting sites that allow you to add comments, questions, and voice overs on the videos. This can help direct the students in their note taking skills and give them immediate feedback on their level of understanding of the topic. By taking notes through videos, I am able to incorporate more hands-on activities and higher level thinking activities into my lessons. If you want to learn about my process for teaching though video, follow the steps below.
Simple Steps to Teaching Through Video
1. Turn Your Presentations Into Videos
There are various ways to convert your already made presentations into videos. If you have a mac and use keynote you can record your slideshow and then export it to a movie. You can also record your slideshow in powerpoint and export it to a movie also. Another way is using a screen casting program to record a video of what you are doing on your computer screen. The one I use is screencast-o-matic. There is also camtasia and screencastify. Finally, if using an iPAD there are various apps that allow you to create a video. I have used the Showme app when I need to explain how to solve problems or draw structures.
2. Host Your Video
Once you have created your video you will need a way for the students to watch it. If you just want to have the students watch the video without asking questions along the way than you could upload it to YouTube, Google classroom, Microsoft OneDrive, or any other platform that you use that will provide a way for students to watch the video. However, if you want to add questions or comments than I would suggest hosting it in Edpuzzle. I love Edpuzzle for the fact that it allows me to add voice overs, comments, and various types of questions. The students get immediate feedback on the multiple choice questions so that they can monitor their progress. It also allows me to set it to prevent skipping and gives me analytics on how many times they watched each segment. Plus it is integrated with Edmodo and Google Classroom.
3. Taking Notes During the Video
Students need to be actively engaged with the video, not just passive learners. Being able to take notes from a video is a skill they need to learn and practice. I have seen some students notes that look more like one long paragraph with no breaks between thoughts and ideas. I have seen other students notes with just one or two sentences. Students need to be taught how to use bullets as a form of organizing information. They need to be taught to leave space between ideas. These notes should be used throughout the unit and for that reason they need to be formatted for easy use. I teach my students to leave 3-4 spaces between each major idea. I remind them of this type of formatting each time the video stops them and asks them to summarize the segment.
4. Partner Talk and Editing
Once students have taken notes from the video they are not done yet. One of the most important steps in the note taking process is sharing and editing of the notes. It is not enough to just take notes from the video. They need the opportunity to discuss their information with a partner, edit their notes, and synthesize them. This step helps students process the information and clarify it so that they can start applying it in class activities. For example, the day after they watch the video, which they do at home, I will spend around 15 minutes in class having students talk with their partners and edit their work. First, I have the students discuss their notes from the first segment of the video. During this time students will add to their notes, cross off information, and highlight the key details. Then, I have them work together to come up with a big idea sentence that synthesizes the information from the segment. They write their big idea sentence in the 3-4 line space that they left while taking notes. Next, they continue to do this for all the video segments. Finally, together they use the big idea sentences to summarize the notes. If there is time I have them share their summaries out loud so that other students can hear their thoughts.
5. Accountability and Assessment
Having students do steps 1-4 is enough to teach the lesson through the video. However, I know some teachers want that extra formative assessment piece to determine where the students are at in their level of understanding. There are various ways you could do this. You could have students write a short summary of the video and ask one question about it that they turn in as they enter the class. You could give them a short 5 question quiz that tests their basic knowledge of the video. Finally, you could host the video on Edpuzzle and track their progress.
I want to leave with one word of advise as I finish this post. Try not to make your videos more than 6 minutes long. Typically videos that are longer than that either have to much content that should be broken down into smaller lessons or have to much extra information that is not necessary. For example, if the video is a math lesson having one to two examples is enough to teach the lesson. More than two and the video becomes to long. Save the extra examples to do in class the day after the video.
For more information check out my blogs on flipped lessons.


