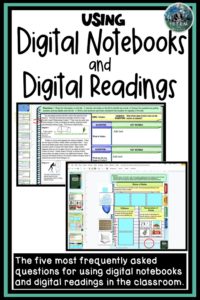
More teachers are having to incorporate technology into their classrooms. Digital notebooks and Digital readings are a great way to introduce the topic and have students review but they can present some challenges. Here are the five most frequently asked question I receive from teachers using these lessons.
#1: Moving the pieces and writing on the slides
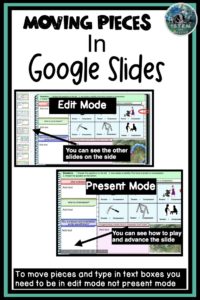
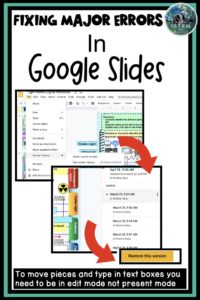
The main question I get asked is how to drag the pieces and write in the text boxes. In order to do this you need to be in edit mode. If you are in presentation mode you will not be able to move the pieces or type in the text boxes. The presentation mode is to view your work when it is done. You will know you are in edit mode if you can see one main slide and all of the other slides in the presentation are on the left side.
#2: I can’t write in the box and I’m in edit mode
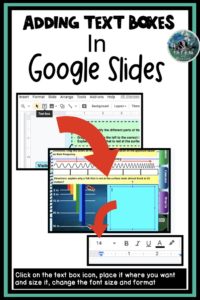
Sometimes students accidentally delete the text boxes. I usually have at least one student every other time I use these in my classes do this. If a text box is deleted they will need to go the the text box icon at the top left and click on it. Then they will click on the space they want to add the text box to. From there they can change the size of the box, font size, and font style.
#3: Adding pictures to the slides
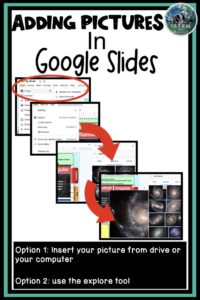
To add pictures you have a few options. If you have a picture that you took or that is in your google drive you will need to go to insert at the top and choose picture or choose the picture icon. From there you can choose to upload your picture or go to your drive and click on the picture you want. If you want a picture from the web the easiest way is to go to tools at the top. From tools choose the explore tool. Type in the type of picture you want and choose image. Once you see a picture you would like you can click on it and drag in onto your slide. You can then modify the size and place it where you would like it to be.
#4: Fixing major mistakes
Sometimes students will accidentally delete a slide. Or perhaps they are working with a partner on the google slide and someone deleted something by mistake and the undo function is not solving the problem. When this happens you will need to go to file, then click on version history, and click see version history. The history of all the moves made will pop up on the right. To get a more detailed history you can click on the triangles. You can then restore it to the version before the mistake happened.
#5: Marking the text when it is part of the background
With the guided readings, the text is part of the background so students can’t just highlight the reading and choose underline. Students are still able to mark the text with underlines, circles, and highlighting if they follow these simple directions.
– Circling key words: To circle key words you have two options.
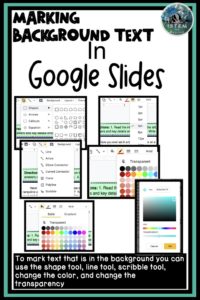
Option 1: Go to the shape icon and choose circle. Then go to the fill color icon which looks like a paint bucket and click transparent. Students can change the color of the circles outline by clicking the border color icon (looks like a pencil). They can also change the thickness of the circle by choosing the border weight icon.
Option 2: Go to the line icon and choose scribble at the bottom. This gives them a free hand to make their own circles. Students can then change the color of the circles outline by clicking the border color icon (looks like a pencil). They can also change the thickness of the circle by choosing the border weight icon.
– Underlining key points: To underline parts of the passage there are again two options.
Option 1: Go to the line icon and choose the line, which is the first one. Use the line tool to underline the sections you want to underline. Students can then change the color of the line by clicking the border color icon (again it looks like a pencil). They can also change the thickness of the line by choosing the border weight icon.
Option 2: Go to the line icon and choose scribble at the bottom. This gives them a free hand to make their own lines. Students can then change the color of the scribble line by clicking the border color icon. They can also change the thickness of the scribble line by choosing the border weight icon.
– Highlighting words: To highlight a word or words you will need to go to the shape tool. Choose the square and place a square over the word or words. This will block the words. From there you need to go to the fill color icon which looks like a paint bucket. Choose custom and then pick the color you want and change the transparency so that it is in the middle. This will give the square a color and allow the text to show through.
 |
| Click Here for a video tutorial |
My students love using digital notebooks and digital readings in the classroom. I hope these tips help you to successfully use them in your classroom also. You can make your own digital notebooks or find an already created digital notebook to fit your need
