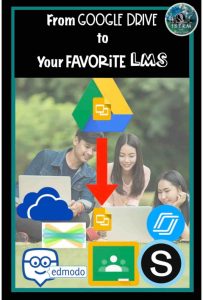
Google is a huge name in education for many reasons. While many schools are using Google Apps for Education and having their LMS be Google Classroom, it is not the only LMS out there. LMS stands for learning management system. It’s the way you assign tasks to your students. I will take you through the steps of sharing your digital lessons from your Google Drive to some of the top LMS sites out there.
Google Drive to Google Classroom
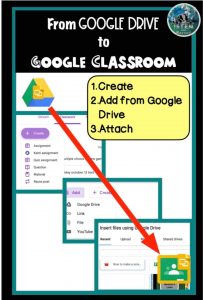
– Although these both start with the word Google, they are not the same thing. Google Drive is like your giant folder. It is where you hold all of your Google app resources. Your Google slides, Google docs, Google Sheets, and so on. Google Classroom is an LMS. It is where you post the specific lessons you want the students to complete.
– To share your lessons to Google classroom Follow the simple steps below.
1. Go to Google Classroom and open the class you want to create an assignment for.
2. Go to classwork and choose create. From there you can choose to post an assignment, quiz assignment, question, material, and more.
3. Title the assignment, add a description, and then at the bottom you will see the add button where you can go into your drive and attach your assignment from there.
4. You can choose whether you want the students to view the assignment, edit the assignment, or make a copy for each student.
Google Drive to Schoology
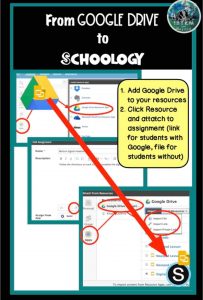
– Although I am in a GAFE school, I prefer to use Schoology as opposed to Google Classroom. To share your Google Drive resources is easy but does require you do complete a simple step.
1. Go to the Resources tab at the top–> open the apps–> choose install apps and select Google Drive.
2. Students can also go to the Resources tab and follow the same directions to attach their own Google Drive assignments if they are also using Google Drive.
3. To share your Google app lessons you will want to create an assignment.
4. In the assignment you will want to click on the resource tab.
5. Choose apps and then search for the resource you want and choose import and then one of two ways.
– Choose import file if your students do not have a Google Drive. This will convert it into the Microsoft equivalent.
– Choose import link if your students have Google Drive. When students click the link it will open in their Google Drive. Students can then make a copy of the assignment and work on it.
– After students have modified the assignment they can then reattach it to turn it in.
Google Drive to Microsoft OneDrive
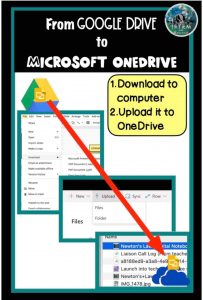
– Microsoft OneDrive is Microsofts version of Google Drive offering their Microsoft apps like Powerpoint, Excel, and Word in place of Slides, Docs, and Sheets. Moving your Google app lessons to OneDrive is very simple.
1. Open the lesson that you would like to transfer whether its Slides, Docs, or Sheets.
2. Click File and then download as to find the Microsoft equivalent.
3. This will download the file onto your desktop.
4. Once on your desktop you can just upload the file to your Microsoft OneDrive.
Google Drive to Edmodo
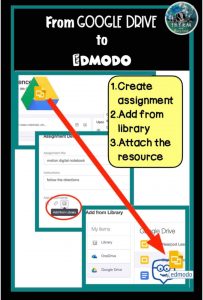
-Using Google apps in Edmodo is very simple.
1. Use your Google account to sign up.
2. Go to your class and add an assignment.
3. At the bottom go to add attachments and choose add from library.
4. There you should see the Google drive icon. Choose your assignment and then you can set it so that students can view it or you can make a copy for every student.
Google Drive to Nearpod
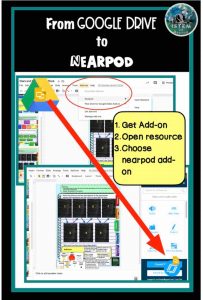
– To use Google apps in Nearpod you will need to sign up with Google so you can link the account. Then follow these steps.
1. Go to my library.
2. Click the create lesson in google slides.
3. Follow the steps to add the add ons extension for Nearpod.
4. Once you have added it you can go to any of your google slides, go to add ons, and open the Nearpod add on.
5. Choose how you want the students to work with the slides and then click save and go to Nearpod to add it to your library.
Google Drive to Seesaw
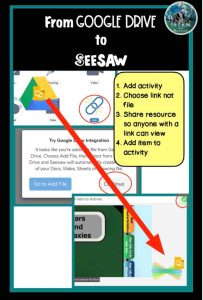
– To use Google apps and allow students to manipulate them instead of just turning them into a PDF, you will need to follow a few steps.
1. Both you and your students should have Google accounts.
2. Click on add and choose assign activity.
3. Create a new activity and then choose add multimedia instructions or example.
4. Click link, NOT file with the Google Drive icon.
5. In your Google Drive open the resource you want to share with your students and set the share to view by anyone.
6. Copy the link onto the link box in seesaw.
7. Give directions for students to open the link, make a copy, work on the resource, and to set their own version to be viewed by anyone and then attach it to turn it in. (Note: if you change the ending of your resource from /edit… to /copy it will force the students to make their own copy making it easier on your students)
It really is easy to use your amazing resources that you have created, been given, or purchased with your students. Head to my Youtube channel for more ways to integrate technology into your classroom.
