Teaching chemical reactions is usually the highlight of the chemistry unit. It is the time when students get to mix chemicals and watch some pretty cool reactions. However, when half or all of your students are learning from home, it can be a little more challenging for them to get the full experience. Follow along as I take you through how I taught our chemical reactions unit with 100% of my students learning from home.

Engage: The Hook
To set the stage and have some fun, I decided to show some pretty cool chemical reaction demonstrations that I found on Youtube. At this point, they only knew about physical changes. So I mixed up the videos to include physical changes and chemical changes. For each video, they had to identify if they thought a physical or chemical change happened. Some of the videos I used were melting butter, elephant toothpaste, fireworks, and mixing food coloring. I tried my best not to show the videos’ title, and I didn’t have the sound playing. I kept track of their predictions, but I wouldn’t tell them if they were right or wrong. That I saved for the unit’s end.
I then did a concept attainment activity to have them form their own definition of a chemical change. I gave them image examples of chemical changes and image non-examples of physical changes. They then went into breakout rooms to come up with a group definition of a chemical change. Each group shared out, and we voted on the top three definitions.
Explain: Chemical Reaction Flipped Lesson
The standard requires students to analyze data and observations to determine if a chemical reaction had occurred. For this reason, I wanted to provide students multiple opportunities to analyze data and observations and write CER’s. This is why I decided to not do a lot of exploring and instead give my students the basic information about chemical changes before we did a whole bunch of experiments. My students watched a video about chemical reactions for homework. This allowed us to spend all of our class time doing chemical reactions, discussing the observations, and writing CER’s. The video gave them all the basic information they needed to determine if a chemical reaction had occurred and why.
The day after the video, I put the students into two groups. The first group was for students that didn’t watch the video for whatever reason. They went into individual breakout rooms, where they were allowed to watch the video in class. The second group was for my students that watched the video and scored a 70% or higher on the practice quiz (which was everyone that watched it). With this group, I showed extra, too dangerous to do in a classroom, chemical reaction videos, and discussed if a chemical reaction occurred and why sot that they had extra practice.
Elaborate: Live Demonstrations of Chemical Reactions
I spent the next few days doing live demonstrations of chemical reactions. The students had to record observations, analyze the data, and then write CER’s to explain if a chemical reaction occurred. I also created videos of the demonstrations in preparation for students experiencing wifi problems and other technical issues. The students enjoyed watching the demonstrations, and we were having fun, but it was not the same as having them do hands-on science.
Elaborate: Chemical Reactions at Home
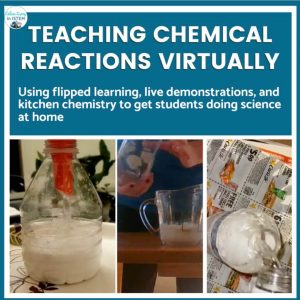
I took advantage of my students being at home to get them doing some chemical reaction experiments using what they already had in their kitchen. They video tapped themselves using flipgrid, explaining what they were mixing and why it was a chemical reaction. After they did their own videos, they were required to watch other students’ videos and then either agree or disagree that it was a chemical reaction and why. Many students chose to mix baking soda and vinegar, some students cooked eggs on the stove, others popped popcorn, and others did some baking. It was nice to see them doing some hands-on science.
Evaluate: Video Demonstration
For their assessment, I gave them a multiple-choice test and a performance assessment. They had to watch a video demonstration, record data, analyze the data, and write a CER to explain if a chemical reaction occurred or not.
Teaching from home and having my students learning from home has been challenging, but I’m not letting it keep my students from doing science. I would love to hear how you are getting your students to do science while they are at home.