For some, summer is just getting started, for others it is coming to an end. Around this time teachers start heading to stores for back-to-school sales and start thinking about the first few weeks of school. With that in mind, I have decided to put together a three-part series to help you get your classroom ready for digital learning.
- Digital Learning Part 1: How to set up Schoology and Edpuzzle and get them ready for your students
- Digital Learning Part 2: How to set up Google Classroom and how to create google forms to gather information about students during the first few days of school
- Digital Learning Part 3: How to teach students about digital citizenship and start the year off right
Digital Learning Part 1: How to set up Schoology and Edpuzzle and get them ready for your students.
Schoology
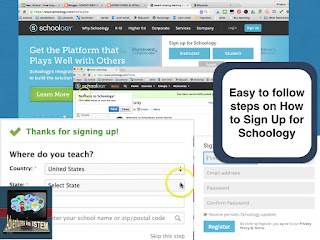
To set up Schoology you first need to sign up. Once you sign up you can take a simple tour of the different features it has to offer. After the tour, you will want to add your courses. If you are a primary teacher you will only need to add one. If however, you are a secondary teacher you probably teach multiple courses and have different sections of those classes. You can put all your students that are in the same course into one group or you can create sections of the groups. For example, I teach both 8th grade Core Science and 8th Grade Pre-AP science. I created the two groups and then created my different sections within those groups. This way instead of having 90 students in one group I have 36 students in each section of the group.
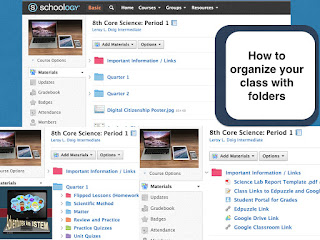
After you have your courses it’s time to organize the information within the course with folders. To make it easier for students to find the information you create folders that will contain the different topics or categories. For example, I have one folder for each quarter. Within my quarter folders, I have folders for homework, assignments, unit quizzes, practice quizzes, and review information. You can always go back and create folders later but it’s easier to set up your folders in the beginning.
Edpuzzle
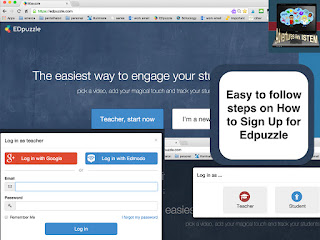
Signing up for Edpuzzle is easy since you can sign in with google. Once you sign in you will want to create your classes. Again if you are a secondary teacher you can decide if you want all your students in one group or if you want to create separate classes. I like to have separate classes so that it is easier to keep track of how individual classes are doing and which students in each class need extra support.
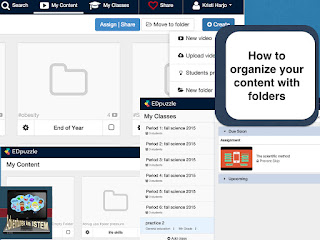
Once you have created your classes it’s time to add your content. You can either upload your own videos or find ones already created by other members of Edpuzzle. A word of caution, if your district has blocked youtube as mine has, you will need to upload your own videos. If you choose a video from the bank you will not be able to tell if it comes directly from youtube or if it was first downloaded and then uploaded. For that reason, unless you decide to choose the videos at your school so you can test them, you will need to use a youtube video downloader first to download the youtube video to your desktop and then upload it to Edpuzzle. This takes longer but it works around the problem of having youtube blocked. Students will be able to see your uploaded videos. After you have uploaded your video you can crop the beginning or end, you can create a voice over if you want your students to hear your voice instead of the person on the video, you can add voice comments if you want students to pay close attention to a point in the video, and you can add the questions. The questions feature is great because you can add an open-ended question, a multiple choice question that can have multiple answers, and just a comment. The multiple-choice questions will be graded automatically and give the students immediate feedback. Once you are done you just save and then its ready to share with your students.
