Force and motion are some of my favorite topics to teach in physical science. Mainly because of how easy it is to bring in real-life situations, student interest, and hands-on activities. These activities lend themselves to hands-on fun in the classroom.
Teaching the Basics
I still believe the best and most efficient way to teach my students the basic vocabulary, formulas, and key information is through the flipped classroom model. Having the students learn the information through a video during homework time allows for more activities in the classroom with me. For some units, I might only have one video, but with this unit, I like to break it up into smaller topics. For example, I first teach them about reference points, motion, and speed. Then, I will move on to velocity and acceleration. Finally, I wrap it up with motion graphs. Having them learn a bit at a time allows me to focus on one piece of our motion unit and have them practice that information with different activities before moving on to another piece.
Motion Activities: Hands-on
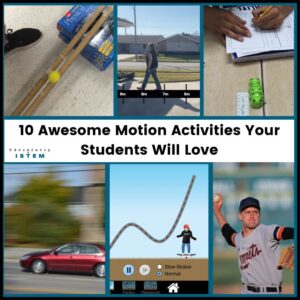
There are so many great activities out there. Each year I have to go through my collection and choose the ones to do that year because I have many choices. Here are a few of my favorites.
- Find the speed of different motions: One of my favorites to do, because it is so simple and easy, is to have students act out different motions and find their speed of them. You can have them walk, run, hop, crawl, speed walk, do high knees or butt kickers. There are so many different ways to get from one end to the other. I will usually mark off a course that is 5 meters and then 10 meters to measure the time at two locations.
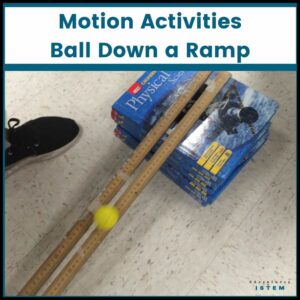
- Ball down a ramp: There are so many different ways you can use this one activity. I like to do this lab multiple times, with each time looking at different motions. First, I do it just for speed. My students will measure how long it takes the ball, or sometimes a toy car, to go from the top of the ramp to the bottom of the ramp. They measure the distance of the ramp and the height of the ramp. For my advanced students, I have them measure the angle of the ramp using a protractor. The second time I do the activity, we are looking at acceleration. I have them measure the time it takes to go down the ramp and then the time it takes to move 1 meter beyond the ramp. They have to find the ramp’s speed and then the speed from the ramp to the 1-meter mark. They also measure the height of the ramp. Finally, I use this same activity when I teach about force and collisions. I have them place a cup that has been cut in half at the end of the ramp. They measure the object’s speed going down the ramp, and then they measure how far the cup moves. For my virtual students, we are still doing this. They are using textbooks, cereal boxes, strong cardboard, shelves… We are getting creative with our ramps, and then they are using balls, hot wheel cars, marbles, any rolling object will due. I had them create paper rulers to use for measuring their height and lengths.
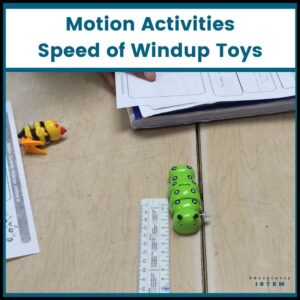
- Wind-up Toys. I found some wind-up toys at our dollar store, so I just gave them to the students and told them to figure out which wind-up toy was the fastest. Some of them waddle, some of them hop, and some walk side-by-side. I love doing this as an inquiry because it has them create their own experiment using their knowledge of speed to test the toys and draw conclusions. For my virtual students, I video tap the wind-up toys near a meter stick so that they can at least still measure and record the time to get the speed.
- Motion of sports. I have my students choose a sport they like to play or watch. They then have to do a presentation about how motion is a part of that sport. They can talk about the speed of a baseball as it leaves the pitchers hand and how a fastball is different from a curveball. They can talk about the speed of a football being thrown versus one being kicked. A soccer ball’s speed being kicked by the goalie versus one being kicked by a forward shooting on goal. They can find the speed of themselves dribbling the ball versus passing back and forth with a teammate. The speed of themselves swimming a lap. This allows them to get more involved because they are doing something that they are interested in
- Are they speeding? You can have them do a fun activity to measure the speed of cars as they drive by the school or their own street if they are virtual. They can then determine if the cars are speeding or driving under the speed limit. They can also graph how many cars are speeding versus how many are driving under the speed limit.
Motion Activities Virtual
With the removal of Flash being supported, some of my favorite online activities are now gone. However, there are still some that are worth looking into. PhET Lab: Forces and Motion. This allows students to manipulate the amount of force or the mass to see how it affects an object’s speed. You can also have them play with friction to see how friction affects the speed of an object.
6. PhET Lab: Energy Skate Park. This allows students to change the skateboard ramp, mass of the skater, and friction to see how it affects the skater’s speed.
7. PhET Lab: projectile motion. Students can change the cannon’s speed and angle to see how it affects the distance the object can travel.
8. Physics Classroom: match that graph. Students watch a car make different motions, and they have to match the car’s motion to the graph that describes that motion. This one is great to help students learn how to interpret motion graphs.
9. Motion Guided Inquiry Google Form. Students move through the Google form and learn how certain motions are represented on a graph. When they get the answer correct, they move on to the next question. When they get the answer incorrect, it brings them to a help page with more guidance, and then it takes them back to the question to try again.
Motion End of Unit Projects
10. Along with a multiple-choice assessment, I like to have my students do a project to show their understanding of motion, speed, velocity, and acceleration. This is a great time for student choice and to allow them to bring in their interests. You can have them choose their favorite rollercoaster ride, and they can then explain how the motion changes throughout the ride. They can identify when it is increasing speed, decreasing speed, and the average speed. They can graph the motion of the roller coaster. They can choose a sport like soccer. They can watch 5 minutes of a soccer game and choose one player to focus on and identify when the player was increasing speed, decreasing speed, moving at a constant speed, or stopping. They can even graph the motion. They can even choose to watch a video clip of their favorite singer giving a concert and describe the singer’s motion while on stage, making sure to choose one that actually moves around on the stage and doesn’t just stand or sit in one place. Have them come up with how they want to show their understanding of motion, speed, velocity, and acceleration and see what amazing things they can produce.
If you are teaching force and motion you will want to head over to this post: 20 LESSONS ON FORCES AND NEWTON’S LAWS YOUR STUDENTS WILL THANK YOU FOR
These short science videos on motion are a nice way to introduce the various topics for your students.
Don’t have time to put together a full unit of lessons for motion? I have you covered with my motion 5E science lesson that will have your students engaged in lots of activities for the next three weeks.


